Matter 1.5 adds support for smart garden devices, including soil sensors, but certified Matter soil moisture sensors are still not available on the market. Some products already exist through bridges, such as ThirdReality’s watering kit using Zigbee with a Matter bridge, but these are not native Matter devices. This project focuses on building a native Matter-over-Thread soil moisture sensor instead.
The guide requires:
-
Grove - Capacitive Soil Moisture Sensor (Corrosion Resistant), other compatible soil sensors would work too.
-
Seeed Studio XIAO MG24 (Pre-Soldered)
-
Thread Border Router, or a phone with Thread radio (recent generations of Pixel or iPhone)
Hardware setup
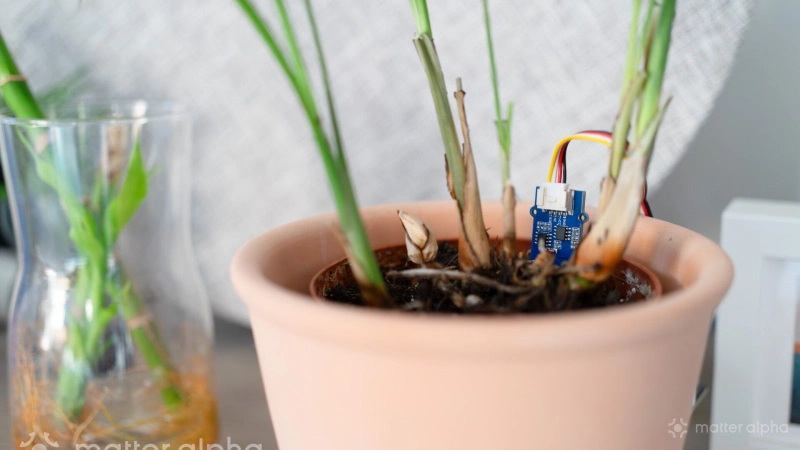
The hardware assembly is simple. The Seeed Studio XIAO MG24 is mounted onto the Grove Base for XIAO by aligning the pins and pressing the board into place. The USB-C port on the XIAO should face the same direction as the power switch on the Grove base.

The Grove capacitive soil moisture sensor is then connected to the first Grove port on the base. This port maps to the analog input used by the firmware. Power is supplied through the USB-C port, and a USB cable (USB 2.0 or above) with data support is required for flashing and serial monitoring.

A Thread border router is required for commissioning. This can be a dedicated border router or a phone with a built-in Thread radio, such as recent Pixel or iPhone models.
Arduino environment setup
Before flashing firmware, the Arduino development environment must be prepared for the XIAO MG24. The guide demonstrated the macOS version. Steps on other platforms are similar, if your device is not recognized by the system, install USB to UART drivers.
After downloading and installing the Arduino IDE, the Silicon Labs board support package must be added through the Boards Manager.

Once installed, the XIAO MG24 board can be selected from the board menu.

If Silicon Labs is not listed in Boards Manager, go to settings, and add “https://siliconlabs.github.io/arduino/package_arduinosilabs_index.json” in the Additional boards manager URL field.
The protocol stack setting must be configured to use Matter from the Tool menu. If any other option is selected, the Matter library will not compile correctly. After configuration, the firmware can be verified and uploaded to the device.
Uploading the firmware
With the environment ready, create a new sketch in Arduino IDE. Copy the following code to it.
#include <Matter.h>
#include <MatterHumidity.h>MatterHumidity matter_humidity_sensor;const int HUMIDITY_SENSOR_PIN = D0; // Analog pinvoid setup(){Serial.begin(115200);Matter.begin();matter_humidity_sensor.begin();Serial.println("Matter humidity sensor");if (!Matter.isDeviceCommissioned()) {Serial.println("Matter device is not commissioned");Serial.println("Commission it to your Matter hub with the manual pairing code or QR code");Serial.printf("Manual pairing code: %s\n", Matter.getManualPairingCode().c_str());Serial.printf("QR code URL: %s\n", Matter.getOnboardingQRCodeUrl().c_str());}while (!Matter.isDeviceCommissioned()) {delay(200);}Serial.println("Waiting for Thread network...");while (!Matter.isDeviceThreadConnected()) {delay(200);}Serial.println("Connected to Thread network");Serial.println("Waiting for Matter device discovery...");while (!matter_humidity_sensor.is_online()) {delay(200);}Serial.println("Matter device is now online");}void loop(){static uint32_t last_action = 0;if ((last_action + 10000) < millis()) {last_action = millis();// Read raw analog value (0 - 1023)int raw = analogRead(HUMIDITY_SENSOR_PIN);// Map raw analog value to humidity percentage (adjust this range for your sensor)float humidity = map(raw, 2500, 1600, 0, 100);// Clamp if neededhumidity = constrain(humidity, 0.0f, 100.0f);matter_humidity_sensor = humidity;Serial.printf("Current humidity: %.01f%% (raw: %d)\n", humidity, raw);}}Before flashing anything, click verify to make sure the code builds cleanly. This catches most setup issues early and saves time later.
Once the build finishes without errors, click upload. During flashing, the XIAO MG24 may disconnect and reconnect over USB, which is normal. If the upload fails or the serial output does not appear afterward, press the reset button on the board and try again.
Matter commissioning
When the firmware upload finishes, the device starts running right away. At this point, log output appears in the serial monitor, which is used for calibration and later for Matter setup. The serial monitor in Arduino IDE should be opened with the baud rate set to 115200.
If no output appears, press the tiny reset button on the board.

When the firmware starts, the serial monitor outputs a web address. Opening this address in a browser displays a standard Matter QR code.

The QR code can be scanned using a supported smart home app such as Apple Home, Google Home, or Alexa by choosing the option to add a new device. The commissioning process follows the same flow as other Matter devices, and progress messages appear in the serial monitor.
If the device does not reset its Matter pairing state, open Arduino IDE and go to the Tools menu. Select the SimplicityCommander programmer, then return to the tools menu and burn the bootloader. After that, upload the firmware again.

Please note, due to the library limitation, the device shows up as a Matter Bridge and exposes the sensor as a standard humidity sensor in Matter platforms.
Sensor calibration
Sensor calibration is a critical step for accuracy. Capacitive soil moisture sensors may not produce consistent raw values across different units, even within the same model.
Start with the dry reading. Hold the sensor in the air and avoid touching the probe. Watch the serial output in Arduino IDE and note the raw moisture value shown on screen. This becomes the dry reference.
Next, take a wet reading. Place the probe into water up to the marked stop line, keeping the electronics above the water. Watch the serial output again and note the raw value. This becomes the wet reference.
These two numbers are used directly in the code in line 49 where the raw sensor value is mapped to a percentage. Replace the existing dry (first number) and wet values (second number) with your own, save the file, and upload the firmware again, so the changes take effect.
You won’t need to repeat the Matter setup process, just wait for it to come back online.

In Matter platforms, you can create automations like this one in the SmartThings ecosystem. When soil moisture drops below 38% for 30 minutes, the app sends a notification and uses Sonos speakers to announce a reminder to water the plants.

(Image Source: Matter Alpha/Ward Zhou)