While installing a Matter smart switch isn’t too hard to figure out, there were unexpected challenges that came up along the way. Here are the difficulties that slowed me down.
Lights controlled by multiple switches can get complicated
When one light switch is used to control a single light or a set of lights, that is a pretty straightforward setup. It’s when those same lights can be controlled by two or more separate wall switches that things start to get complicated. You need a different type of switch, known as a 3-way or 4-way switch. Confusingly, a 3-way switch is for setups where two switches control a light, and a 4-way switch is for situations where a light can be controlled by three or more switches.
3-way switches still have your two hot wires (line and load), your ground wire, and your neutral. They also add another wire into the mix known as a traveler. This wire connects your two switches together, so the electrical circuit knows whether either one is switched on. The traveler wire is either black or red, so it’s not always obvious which it is.

To wire these switches, you ultimately need to figure out which of the two switches always has an active line wire. You’re going to install your smart switch on that one and a regular switch on the other. I purchased Eaton rocker switches that best matched the size and appearance of my Tapo lights.
4-way switches are the same, except since they’re connected to two separate switches, they have to connect to two traveler wires instead of one. The Tapo S515 can work in either 3-way or 4-way setups, but that's not the case with dumb switches. An Eaton 3-way switch is different from an Eaton 4-way switch.

Tapo Smart Wi-Fi Light Switch S515
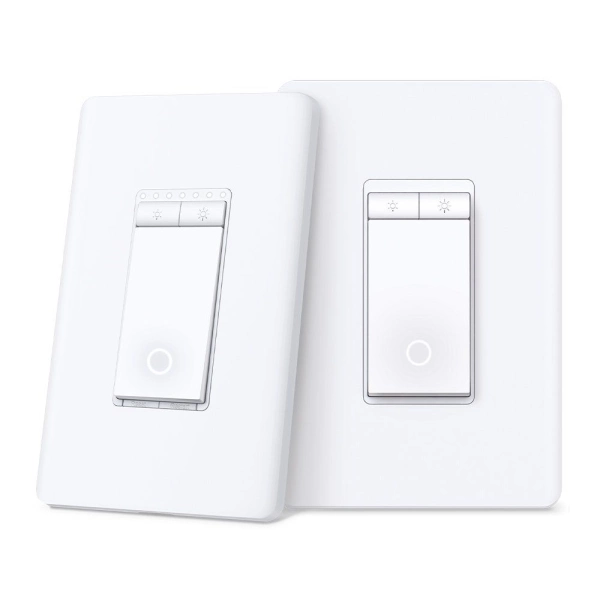
Tapo Smart Wi-Fi Dimmer Switch, 3-way kit S515D
3-gang and 4-gang setups can get crowded
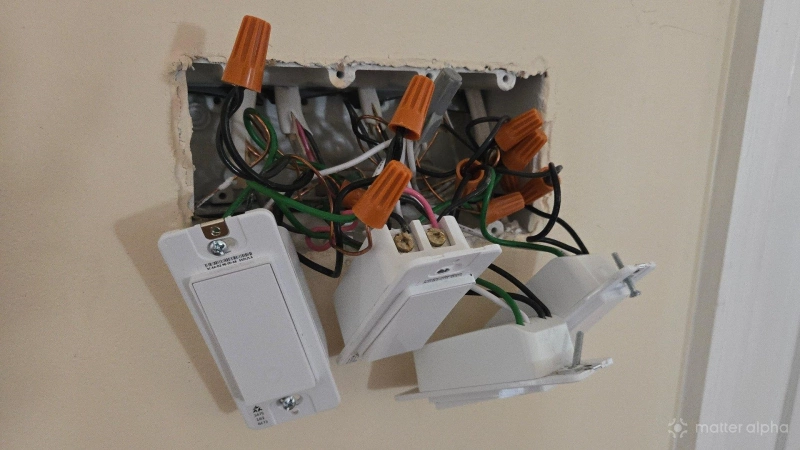
If two or more light switches share a single wall box and wall plate, that’s what’s known as a 2- , 3-, or 4- gang setup. My first 2-gang setup was a tad difficult, since I had to learn how to align the switches so that a single wall plate could fit over both at the same time. But it wasn’t until I attempted my first 3-gang setup that I really had to adjust how much time installing all of these switches could take me.

Unlike charging cables and power cords, the wires in our walls are stiff, rigid things. It requires more muscle to get them to move, and it can be genuinely difficult to get all of them to fit. This is because smart switches are significantly thicker than regular wall switches. The added electronics on the back of each switch means there is less space for the wires in the box, and cramming three of these fat smart switches into one box can be a real exercise in both stamina and patience.
While my home has multiple 3-gang wall plates, there is thankfully only a single 4-gang one. I’m still wrestling with that one, and it’s not due to the space alone.
Neutral wires are the biggest challenge
I’m not an electrician, so I don’t want to tell you the correct way to wire up your neutral wires. In most cases, I've had plenty of success wrapping all the neutral wires together under a single wire nut. This is not a problem when there is only one switch, and it’s not that big a deal when there are two.
My 4-gang switch has a bundle of five neutral wires in the back that I can connect to. Introducing four smart switches means attempting to wrap nine wires together up under a single nut.

Is there a better way to handle this? I hope so. For starters, a neutral wire that comes loose and touches another wire can cause a short circuit, which can lead to a fire. Two, a smart switch stops working if its neutral wire isn’t firmly connected to another. It's hard to establish firm connections in such a large bundle. I bought a larger wire nut than I used for the other wires, but even then it was not easy to get all the wires to stay put.
I forgot to budget for additional wall plates ahead of time
TP-Link supplies wall plates for each of its switches, but these only work for switches that are all by their lonesome. In my home, that isn’t all that many switches. Most rooms have at least two switches side-by-side (one for the light and one for the ceiling fan).
This meant I needed to find and buy wall plates for all of my 2-, 3-, and 4-gang lights. Since these wall plates wouldn’t exactly match the plates from TP-Link, I ended up buying new plates for every switch. I purchased Eaton screwless plates from Lowe’s (they aren't actually screwless–the screws just aren't visible).

Altogether, buying all of these wall plates was roughly a 50% increase in the cost of this whole project. I have purchased over 50 switches for a little under $600, but I then spent another couple hundred in wall plates. Eaton 1-gang plates were available in 5-packs that cost under $20, whereas Eaton 4-gang plates cost over $10 each. There are ways to save money here, but I ultimately didn’t want to finish this project with plates I knew I’d want to come back and replace later. Better to get the ones I like now.
I ran into issues with dimmers
Of the 50 smart switches I originally purchased, there were three I didn’t end up using. These were dimmers. I had hoped I would be able to dim the lights in several rooms in my home, since my electrician informed me that the lights they installed when wiring my home are dimmable. Yet, I found the dimmers only worked for me when one switch controlled one lights. In rooms where one switch controlled multiple lights (the vast majority of our lights are recessed lights), the lights would flicker rather than dim.

What causes the flickering is more than I’ve been able to figure out, so dimmers are an upgrade I may ultimately call an electrician to figure out down the road. For this project, I only ended up with one dimmer, and the rest of my lights are simply on or off.
Enough about wires—where's the software?
Alright, it's time for the fun bits. Next time, I'll dive into the apps and voice assistants I use to control my smart lights and how well that has all worked out.