Want to automate what happens when your doors and windows open? At $8 each, the IKEA MYGGBETT door and window contact sensor is an affordable way to make that happen, but it won’t fit on every door, and you’re still going to need to prepare a large budget if your home has lots of windows. I've had a mixed experience with the product so far, but I'm not quite ready to give up on it just yet.
MYGGBETT Door/Window Sensor
Unboxing and setup
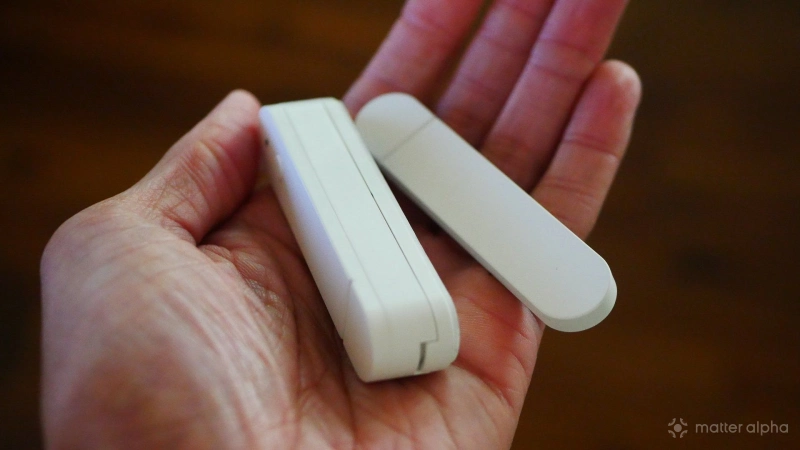
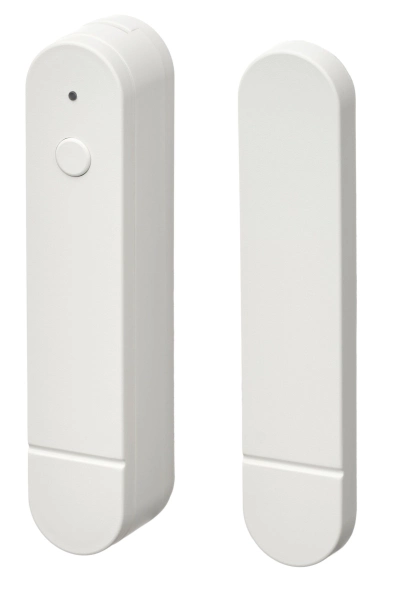
Like the rest of this year’s new IKEA smart home product line, the MYGGBETT comes in a small box only slightly larger than the unit itself. Inside, you will find two parts of the contact sensor, along with two tiny paper booklets. A single AAA battery is required, and one does not come included. To insert this battery, you will need to stick a flat-head screwdriver into one of the grooves at either end of the bigger sensor, which will allow you to pry off the backplate.
Once the battery is in place, the device immediately enters pairing mode, which is indicated by the flashing yellow light at one end. You will want to pair before adhering the contact sensors to a door or window. The Matter pairing number and QR code are easily accessible, and the process is largely the same regardless of your smart home platform. Here is how to add a Matter device in Google Home, and here is how I add one in Homey, the hub I currently use.

Then the time comes to adhere the sensors in place. When the two parts of the MYGGBETT are in proximity to one another, a door or window is closed. When you open said door or window, the sensors pull away from each other and inform your smart home hub. Knowing this will help you determine how to place the sensors.
Each sensor comes with a 3M sticker on the back, so you can stick them wherever they need to go. In contrast with IKEA’s other offerings, I needed to seek out the instruction booklet this time around. From the illustrations provided, it was clear the sensors would work with my windows, but it was unclear whether they would work with my doors. They work best with a flat surface to adhere to, and the trim above all of my doors isn’t fully flat. My doors are a no-go, but the sensors can work with my windows.

Be very careful when pressing the MYGGBETT into place. The sticker it comes with is very strong and doesn’t peel off easily. The two parts of my sensor weren’t lined up exactly right after my first attempt, and attempting to nudge them more into alignment yielded little success. Take your time during installation. It is worth going slower to get it right the first time, lest you be left with bulky and off-center electronics hindering your view.
Integrating the MYGGBETT with your smart home
Once added to my Homey Pro, the MYGGBETT surfaces two types of information. The primary task is to inform you whether the two parts of the sensor are in contact. Homey phrases this as a “Contact Alarm” with the binary option of “Yes” and “No.” “Yes” indicates that the alarm is active, meaning the door or window is open. A “No” means it is closed. This isn’t the most intuitive language, to be sure.

I use the contact sensor to create an automation known in Homey as a Flow. The contact sensor is located on a window in my home office. When I open the window, this signals the TAPO S505 light switch controlling my ceiling fan to turn on. This way I automatically circulate the air whenever the window is open. I could just as easily signal opening the window to sound an alarm instead, with the option to restrict this alarm to a set time like after 9:00 PM. That said, I would need to have a Matter-compatible device capable of playing an alarm, like a smart speaker, in order to do so.
The MYGGBETT is equally effective at all of these tasks, since the only aspect it has any involvement in is signaling your smart home hub whether the contact between the two parts of the sensor is severed or not. The MYGGBETT can also communicate another bit of information, and that is its battery status. This allows you to see at a glance when your contact sensor is low. This is particularly vital if you’re using your sensor to trigger an alarm. You don’t want to have false peace of mind, thinking your windows are closed when really the battery is dead.
How you view this information varies with your smart home platform. In Homey, there is a dedicated tab where all of my battery-based devices are listed. An approach that works regardless of platform is to have the MYGGBETT trigger an automation whenever the battery life is low.
Downsides to the MYGGBETT design

The MYGGBETT is not a small contact sensor, which is true of IKEA’s entire AA and AAA-based line of smart home products. I applaud the decision to use these batteries, as it makes the products more accessible and easier to maintain long term. But having to be large enough to accommodate AAA batteries does make the product bulky. The contact sensor on my windows is about as bulky and noticeable as the latches that keep my window closed.
Since the battery doesn’t come included, you need to factor that into the cost of the sensor. If I were intending to put one on every window in my home, not only would I need a couple dozen sensors priced at $8 each, but I would also need to factor in the cost of two dozen AAA batteries as well. That reduces how much cheaper IKEA’s products are than the competition, since they’re passing along the price of the battery to you.
The MYGGBETT is a Matter-over-Thread device. In theory, that’s a pro. If your home has a robust Thread network, each MYGGBETT benefits. Unfortunately, Thread introduces its own set of issues. I regularly have issues with my Thread devices showing up as unavailable, which is not an uncommon issue for those of us who have more than one smart home hub. If you only set up one, you’re likely to have a better experience.
As a reminder, filling your home with contact sensors won’t make your Thread network any stronger. While an AC-powered thread device like the IKEA ALPSTUGA expands the range of your mesh network, battery-powered devices like the MYGGBETT function merely as endpoints to preserve battery life
I've had an inconsistent experience since setting up the MYGGBETT. It was easy to set up, then the automation I created failed the very next day. The sensor seemed to be doing its part—the light flash every time I opened and closed by window, indicating that it detected contact or lack thereof. Yet this wasn't communicating to my smart home hub. After re-pairing the device, I've had a better experience, though I still can't quite expect it to work 100%.
I suspect the issue lies in my Thread network, but that's a degree of troubleshooting I have not yet been able to figure out.
Should you buy the IKEA MYGGBETT?

At only $8, the MYGGBETT is an affordable way to see if you want to automate your windows and doors. Personally, I don’t yet have many reasons to do so, making this the IKEA Matter-over-Thread product I’ve felt the most lukewarm toward. I've also had intermittent reliability, but this may be an issue with Matter and Thread moreso than IKEA's impementation, leaving me hesitant to call this a bad product. Still, I wouldn't turn to these if looking to build my own home security system. Not yet.
The MYGGBETT may be a bit bulky and not immediately intuitive, but I suspect that as long as you have a reliable Thread network, it does what it promises to. At its price, it doesn't hurt to try one out for yourself, and if it works reliably, then head back for more.